Installing Kotal Pro on DigitalOcean
In this guide, we will
- Install Kotal Pro on DigitalOcean.
- Access the Kotal Pro dashboard.
- Activate Kotal Pro subscription.
- Deploy Polkadot node.
- Set Custom domain.
- Create API endpoint for Polkadot node.
💡 The only requirement for Kotal Pro is a Kubernetes cluster. Highly available Kubernetes clusters can be created using DigitalOcean-managed Kubernetes service within a few minutes.
After you create a Kubernetes cluster, make sure you've access to it
kubectl cluster-info⌨️ Install Kotal Pro on DigitalOcean
Kotal pro can be installed using Kubernetes package manager helm. Make sure you've helm v3 installed on your machine.
helm versionAdd the Kotal helm chart repository and update your repositories
helm repo add kotal https://kotalco.github.io/kotal-helm-chart
helm repo update
Kotal Pro is now ready to be installed
helm install kotal kotal/kotal -n kotal --create-namespaceThis command will install the kotal chart from the kotal repository in a namespace called kotal (recommended) and will create this namespace if not available.
👀 Access Kotal Pro Dashboard
Kotal Dashboard is available at a public IP address that can be obtained by
kubectl get svc -n traefik -wVisit the external IP from the output of the command above.
Kotal Pro is now up and running in your Kubernetes cluster. It needs to be unlocked to rock and roll 🎸.
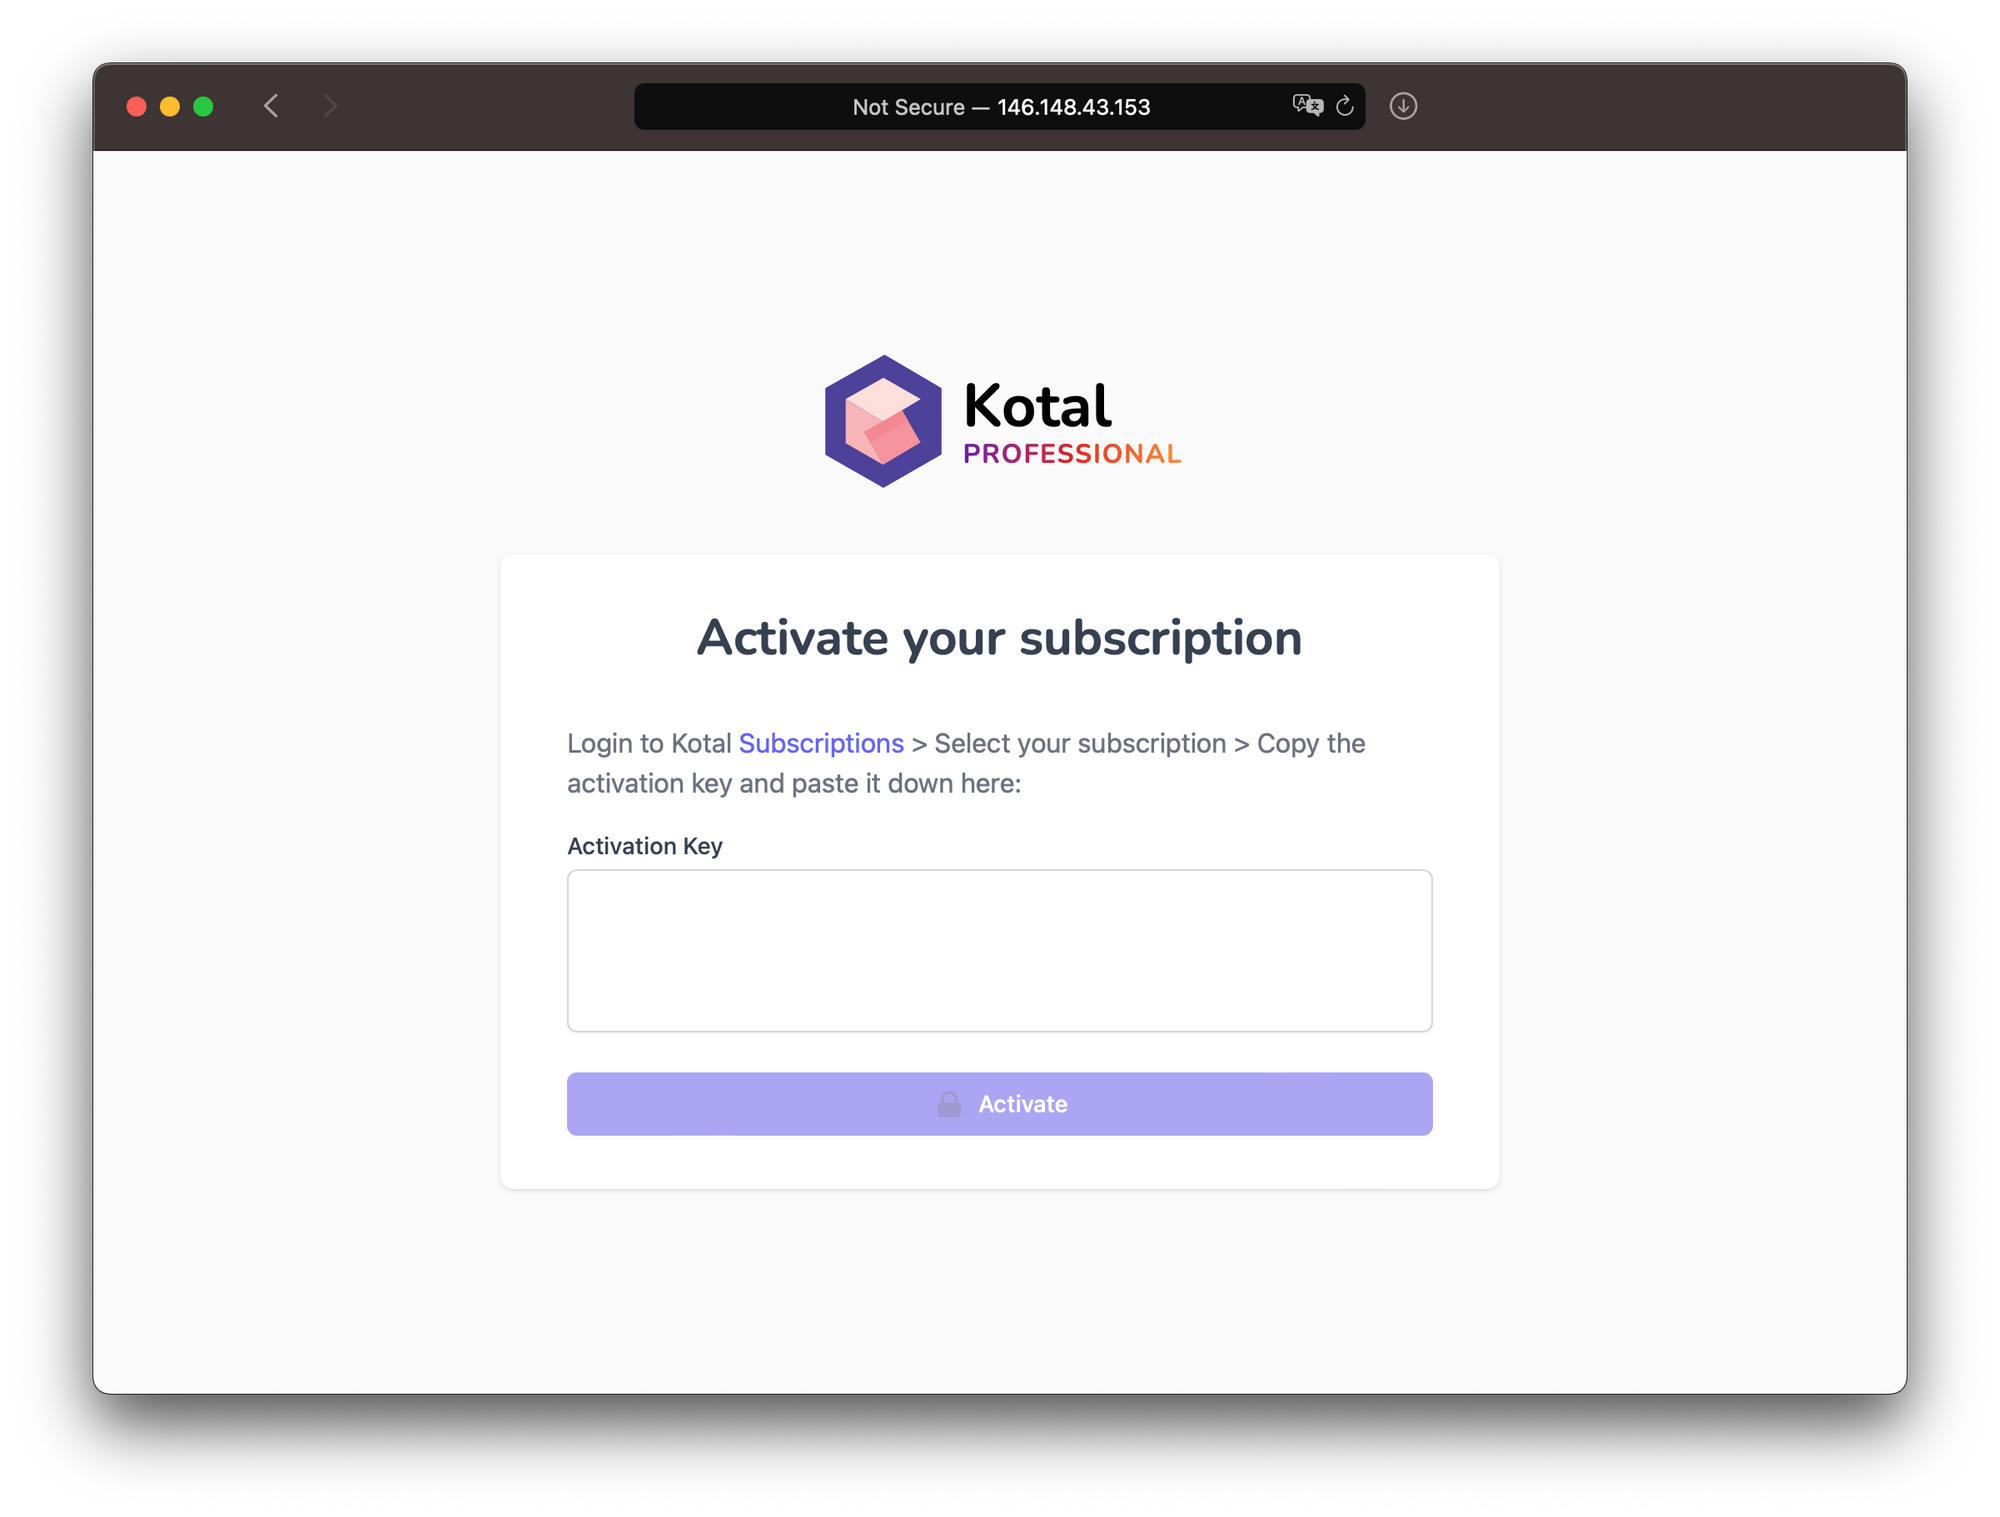
🔥 Activating your subscription
To unlock Kotal Pro on your infrastructure, you need to connect it to a Kotal subscription.
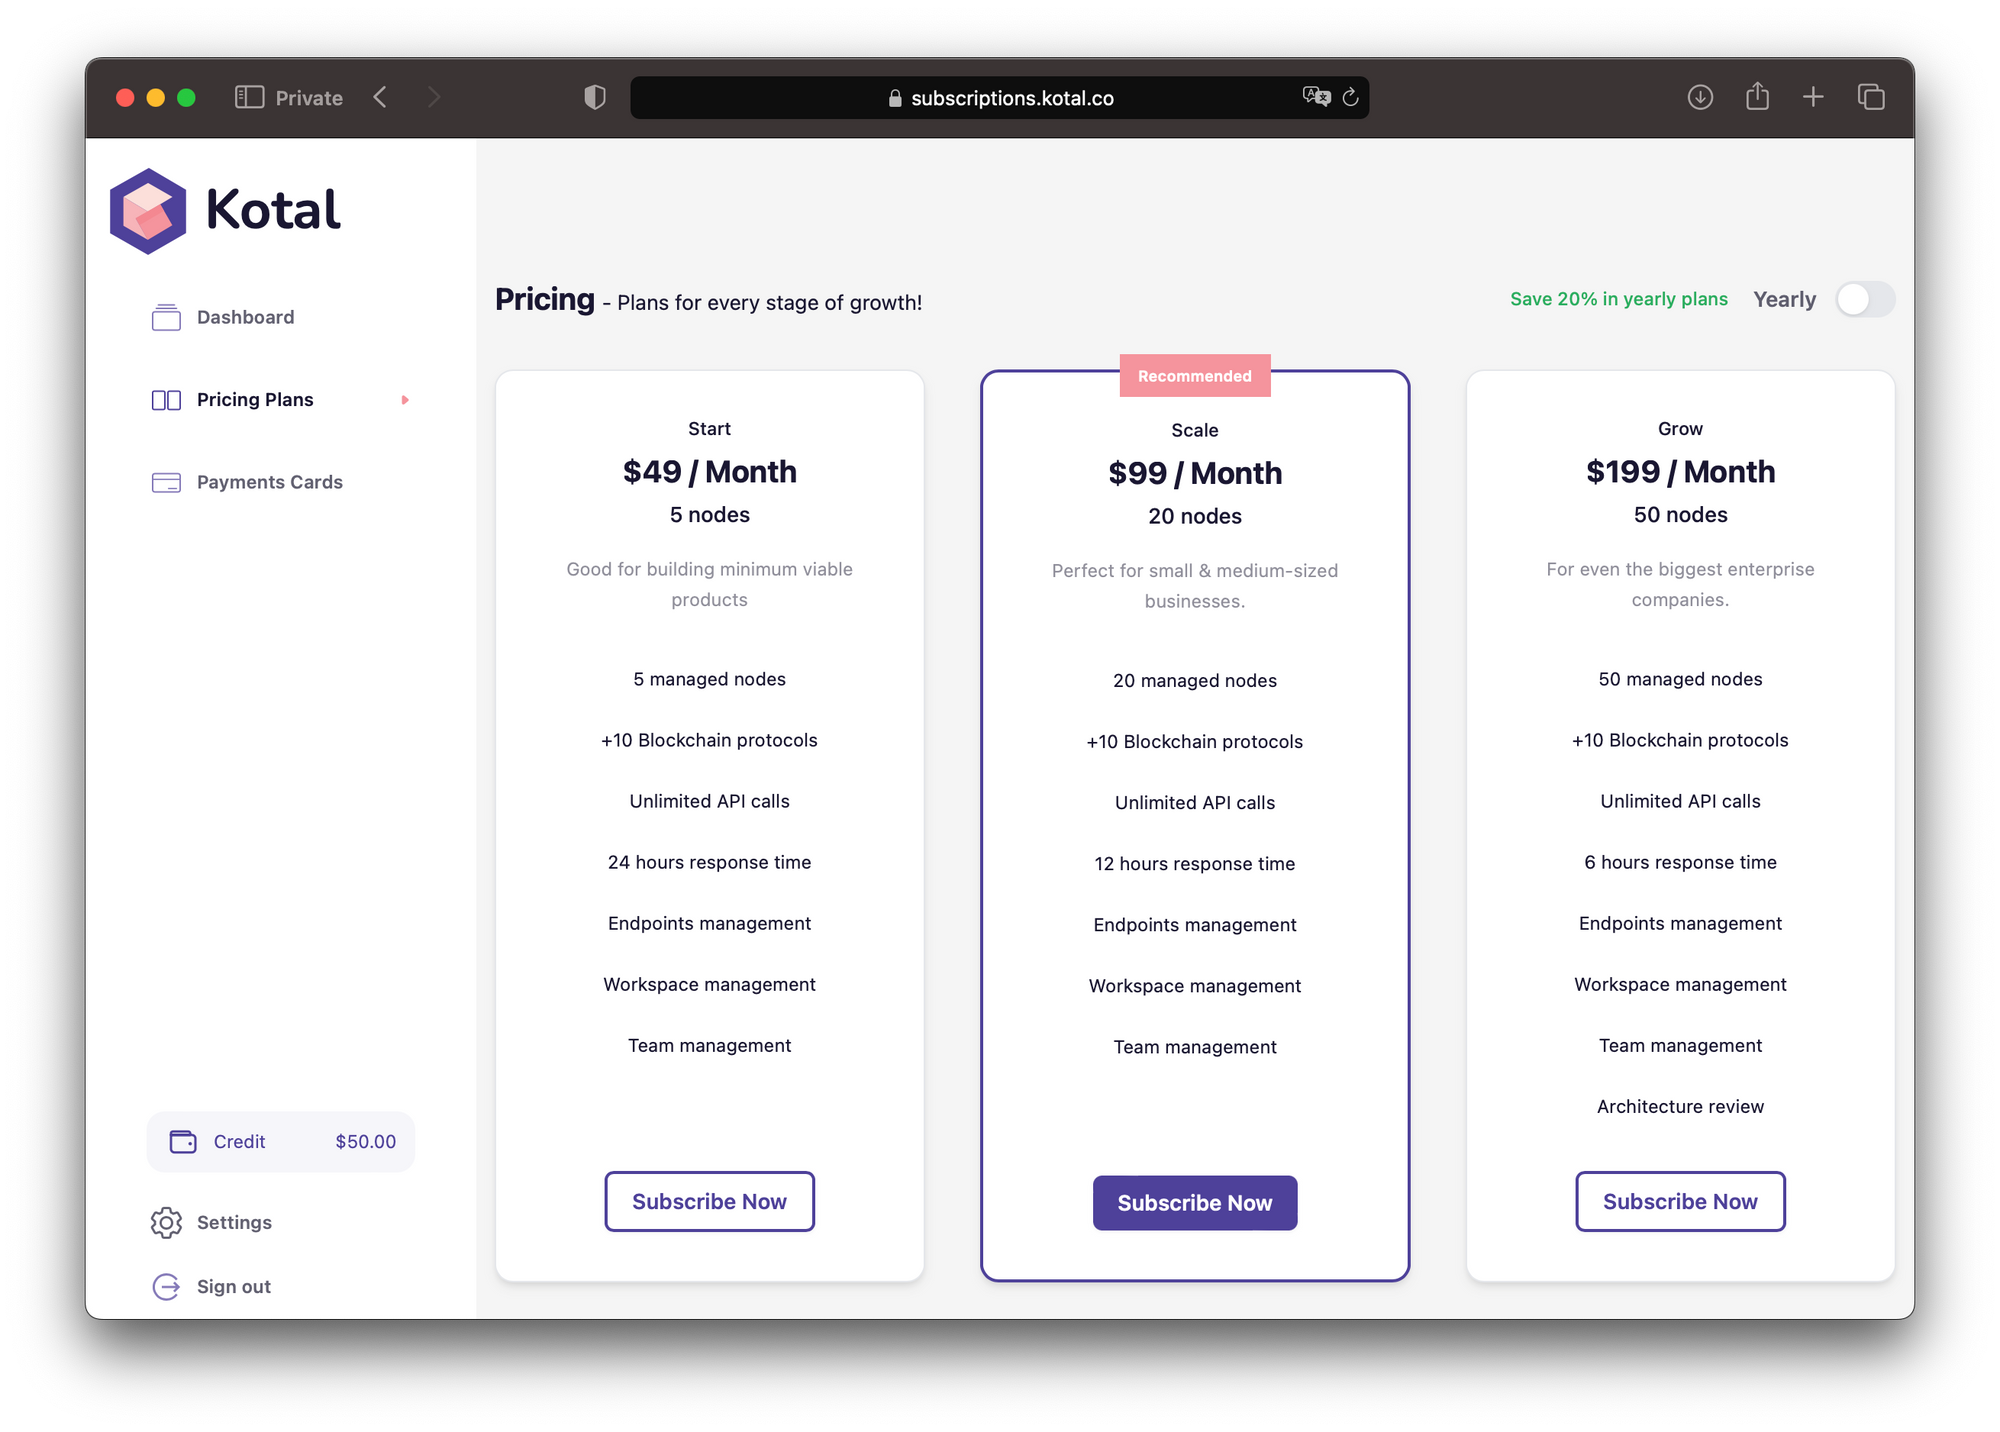
In a new browser tab, open subscriptions.kotal.co. Sign up and subscribe to any plan.
No credit card is required. Enjoy 30-day free trial for your first subscription 💵
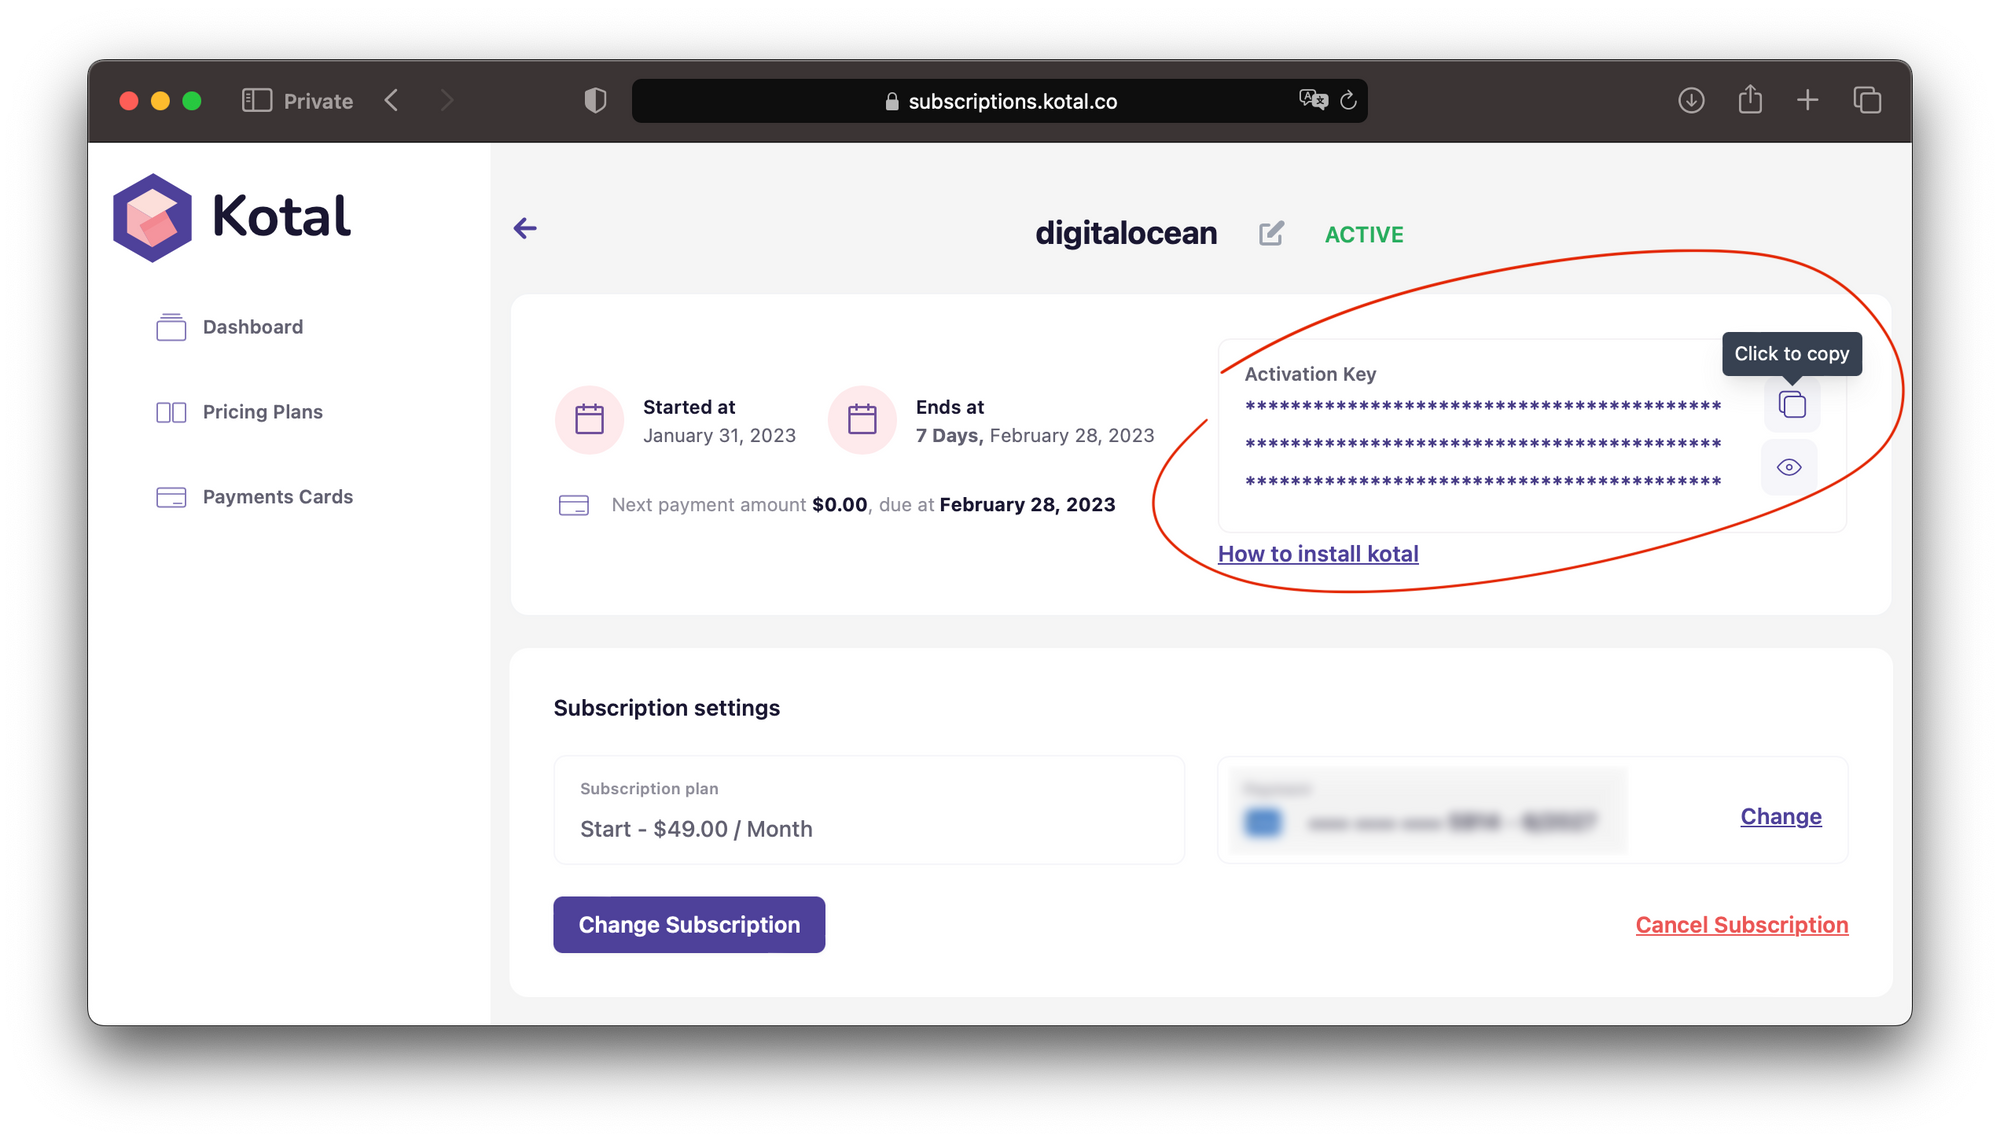
After subscribing to any plan, a new subscription will be created for you. Go to the subscription from the dashboard page, and copy the activation key.
Navigate back to your Kotal Pro dashboard and paste the activation key
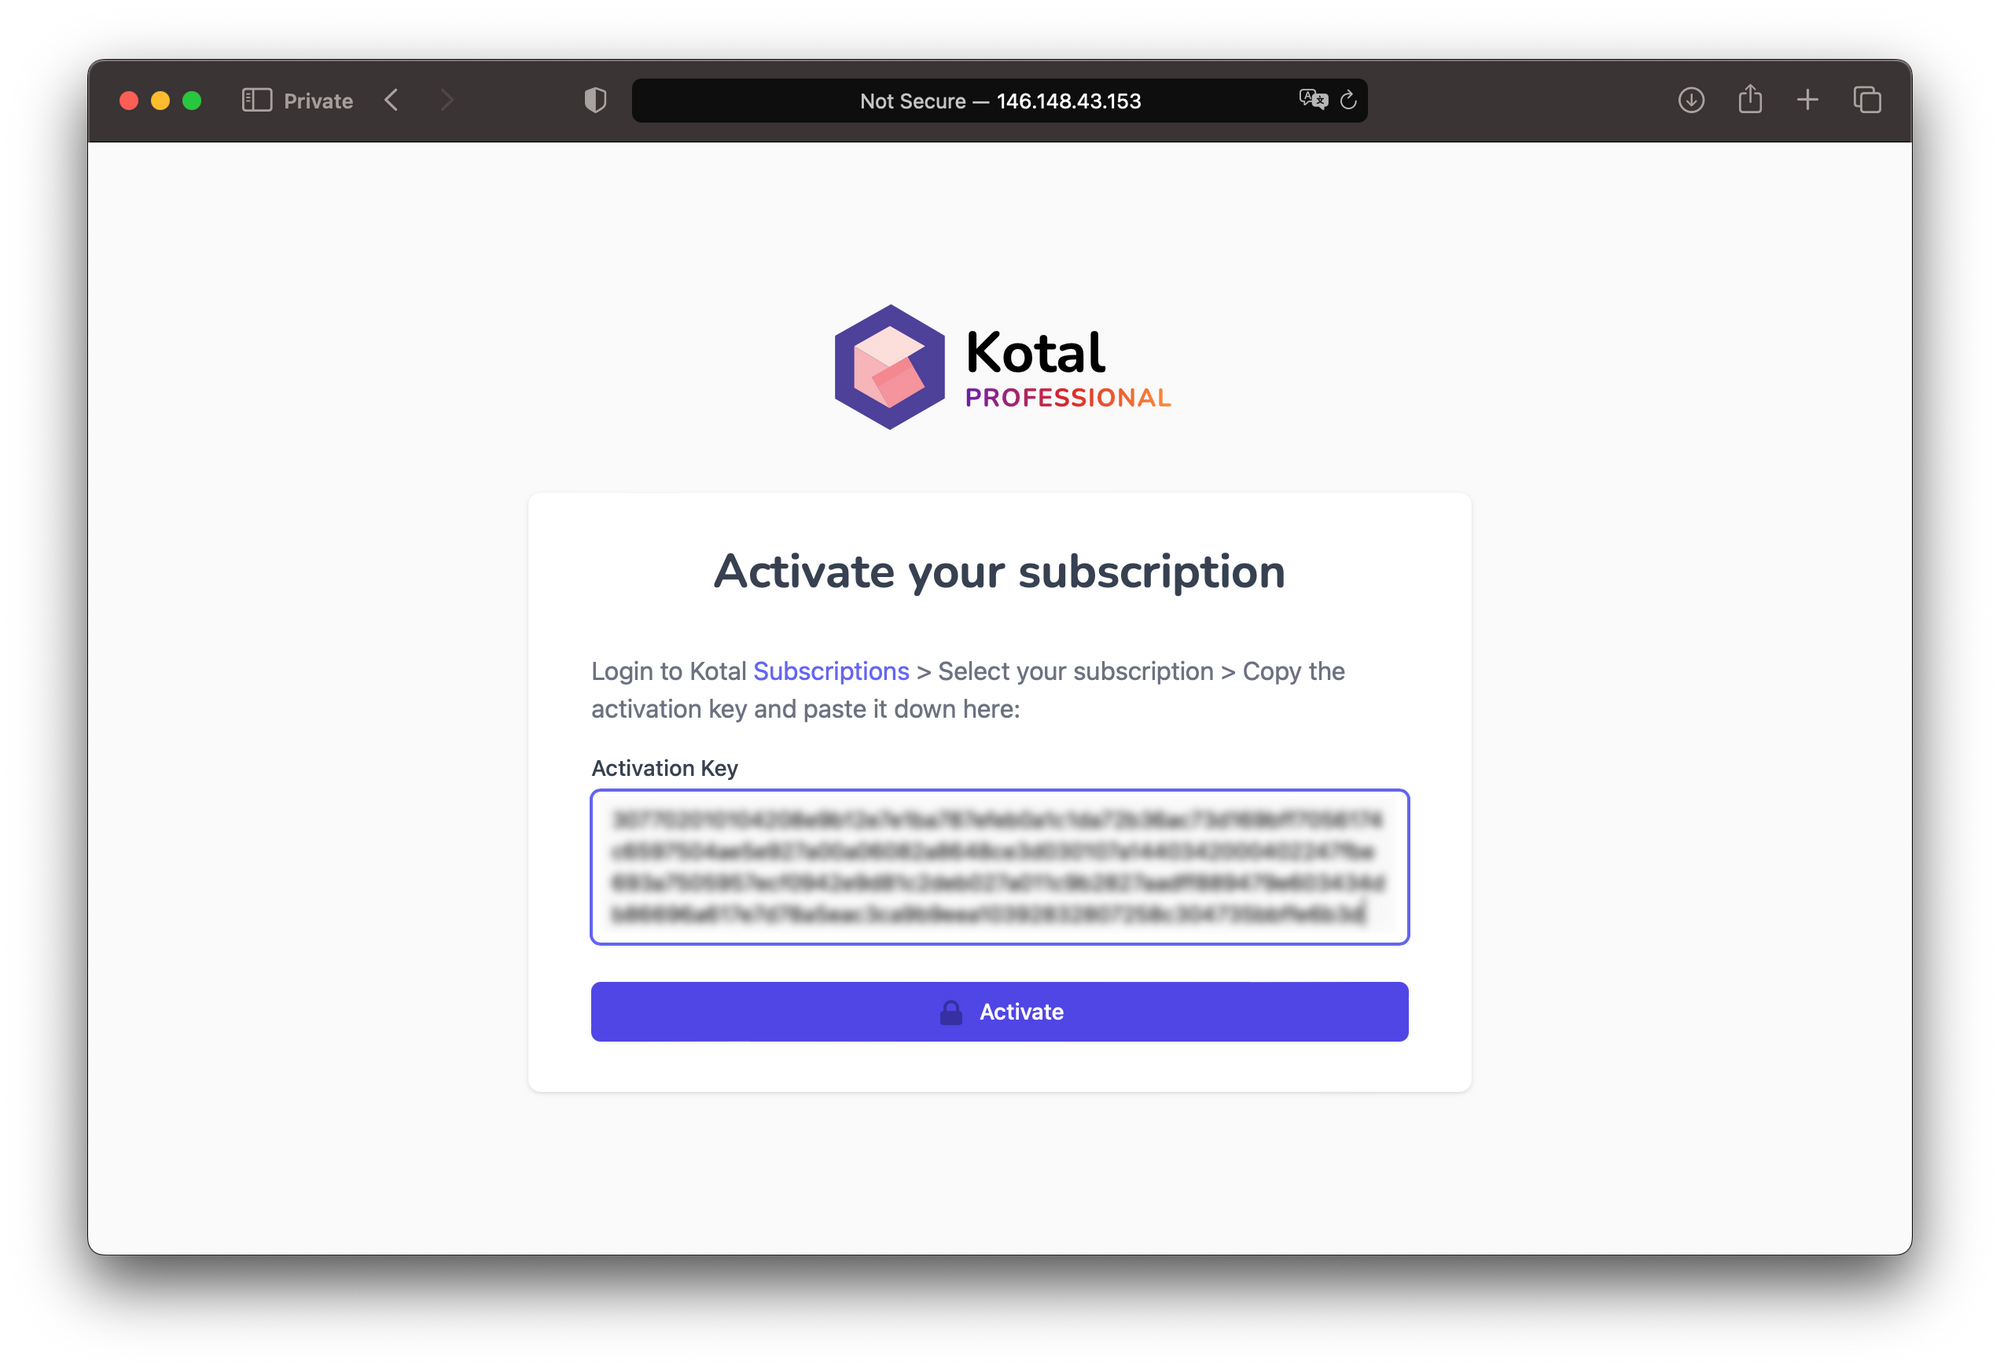
Click on activate 🎉 your subscription will be activated and Kotal Pro will be unlocked. Now you can register as a platform admin.
🚀 Deploy Polkadot Node
In your Kotal Pro dashboard, go to deployments > Polkadot and click on the + New Polkadot node button
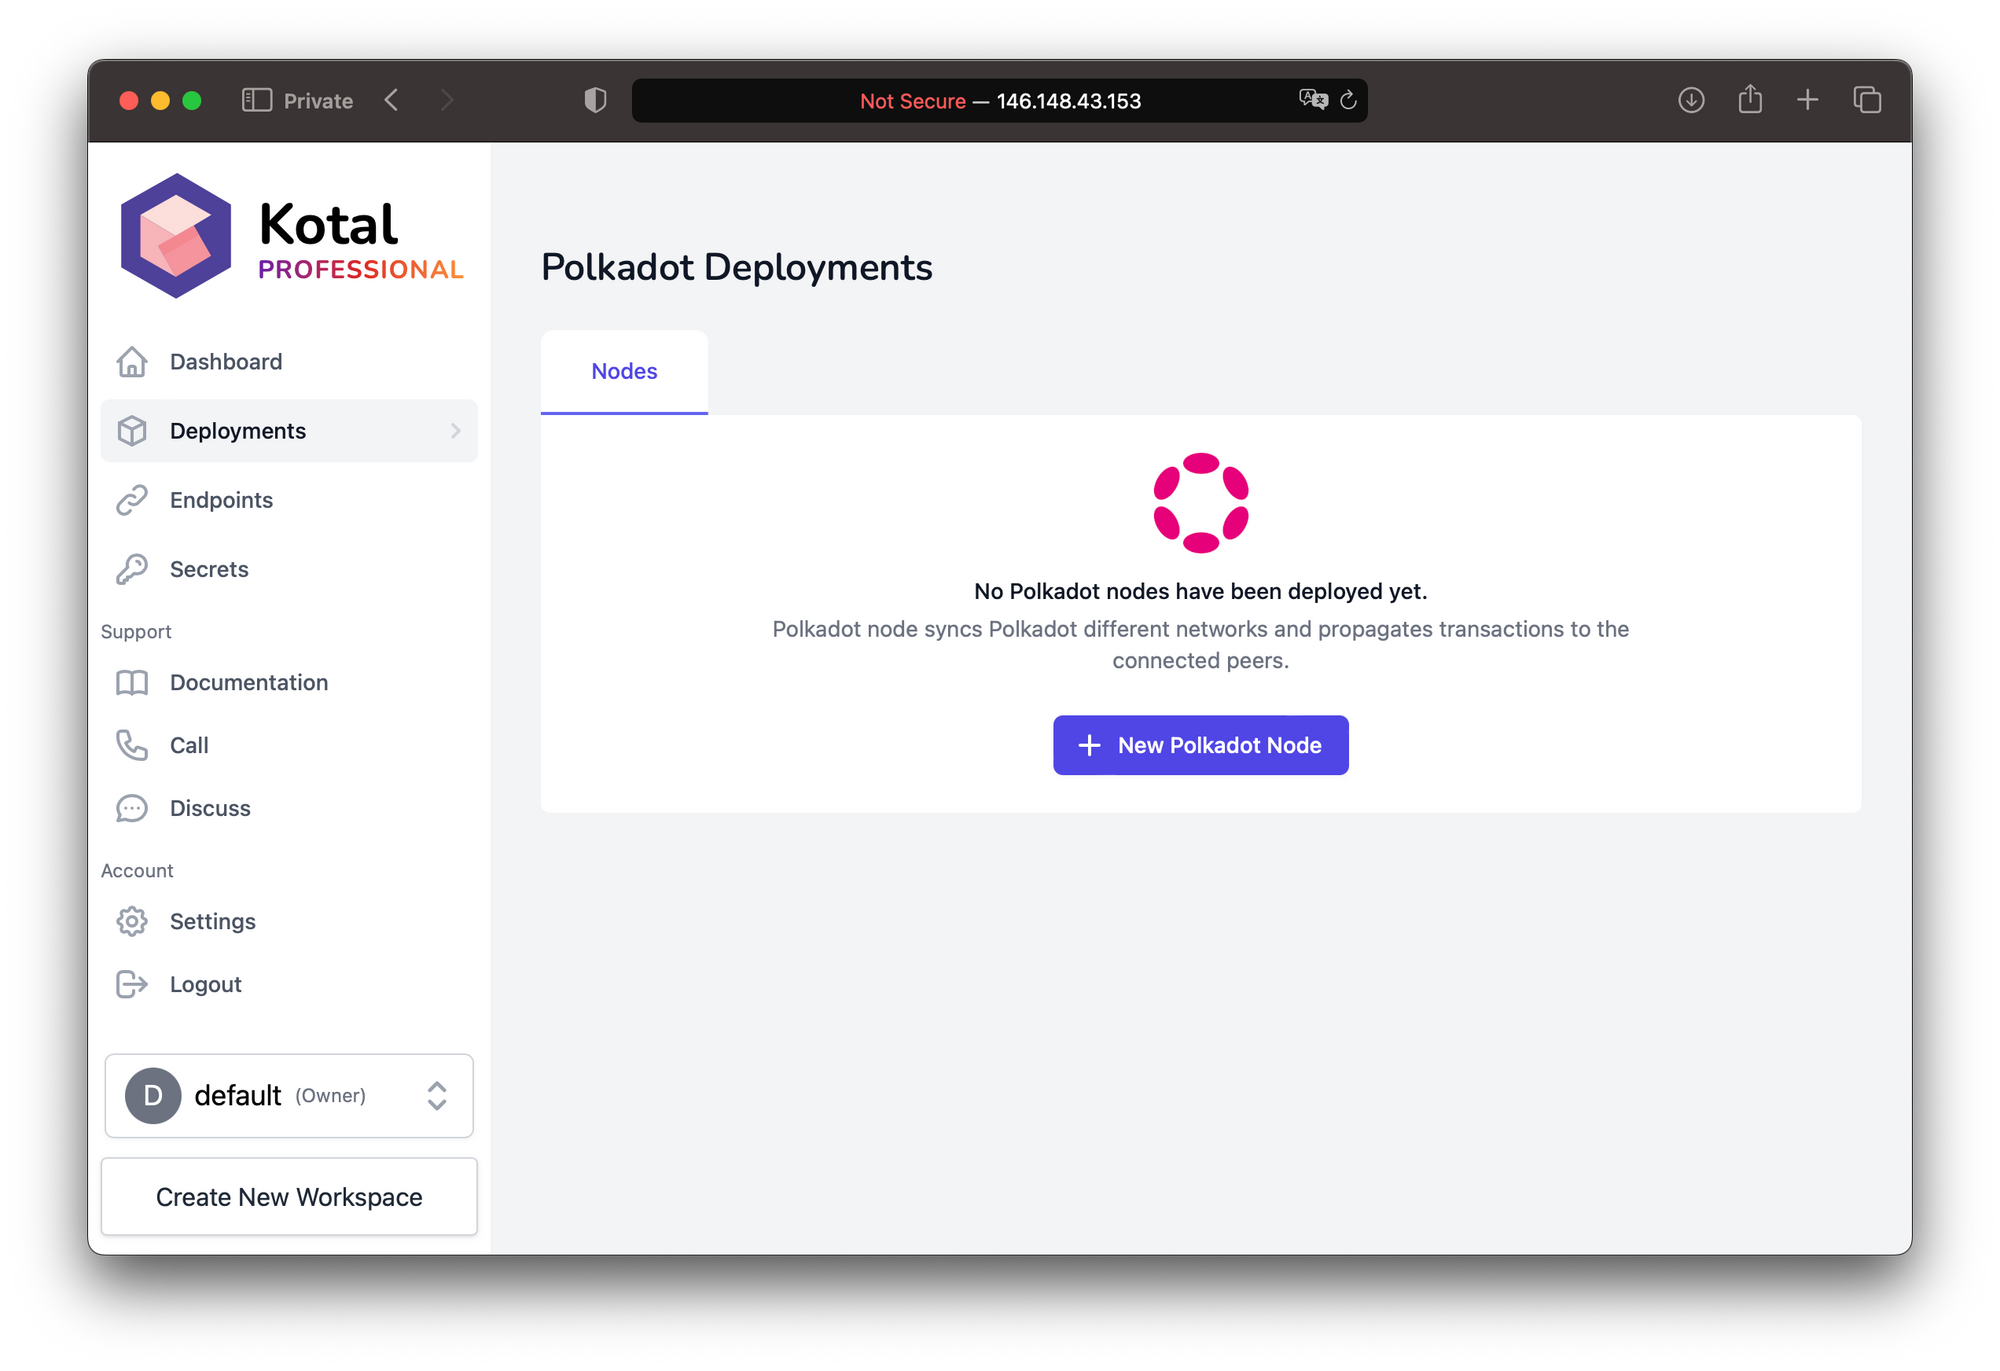
Give your node a name. Select the client version, and chain to sync. Click on the create button. Your node will be created and up and running in a few seconds.

🌎 Set Custom Domain
As you can see the dashboard is accessible from a public IP address without a TLS certificate, which is not the best UX and security.
To set a secure custom domain that can be used to access the Kotal Pro dashboard, and all endpoints created using Kotal. Go to settings > platform > domain.
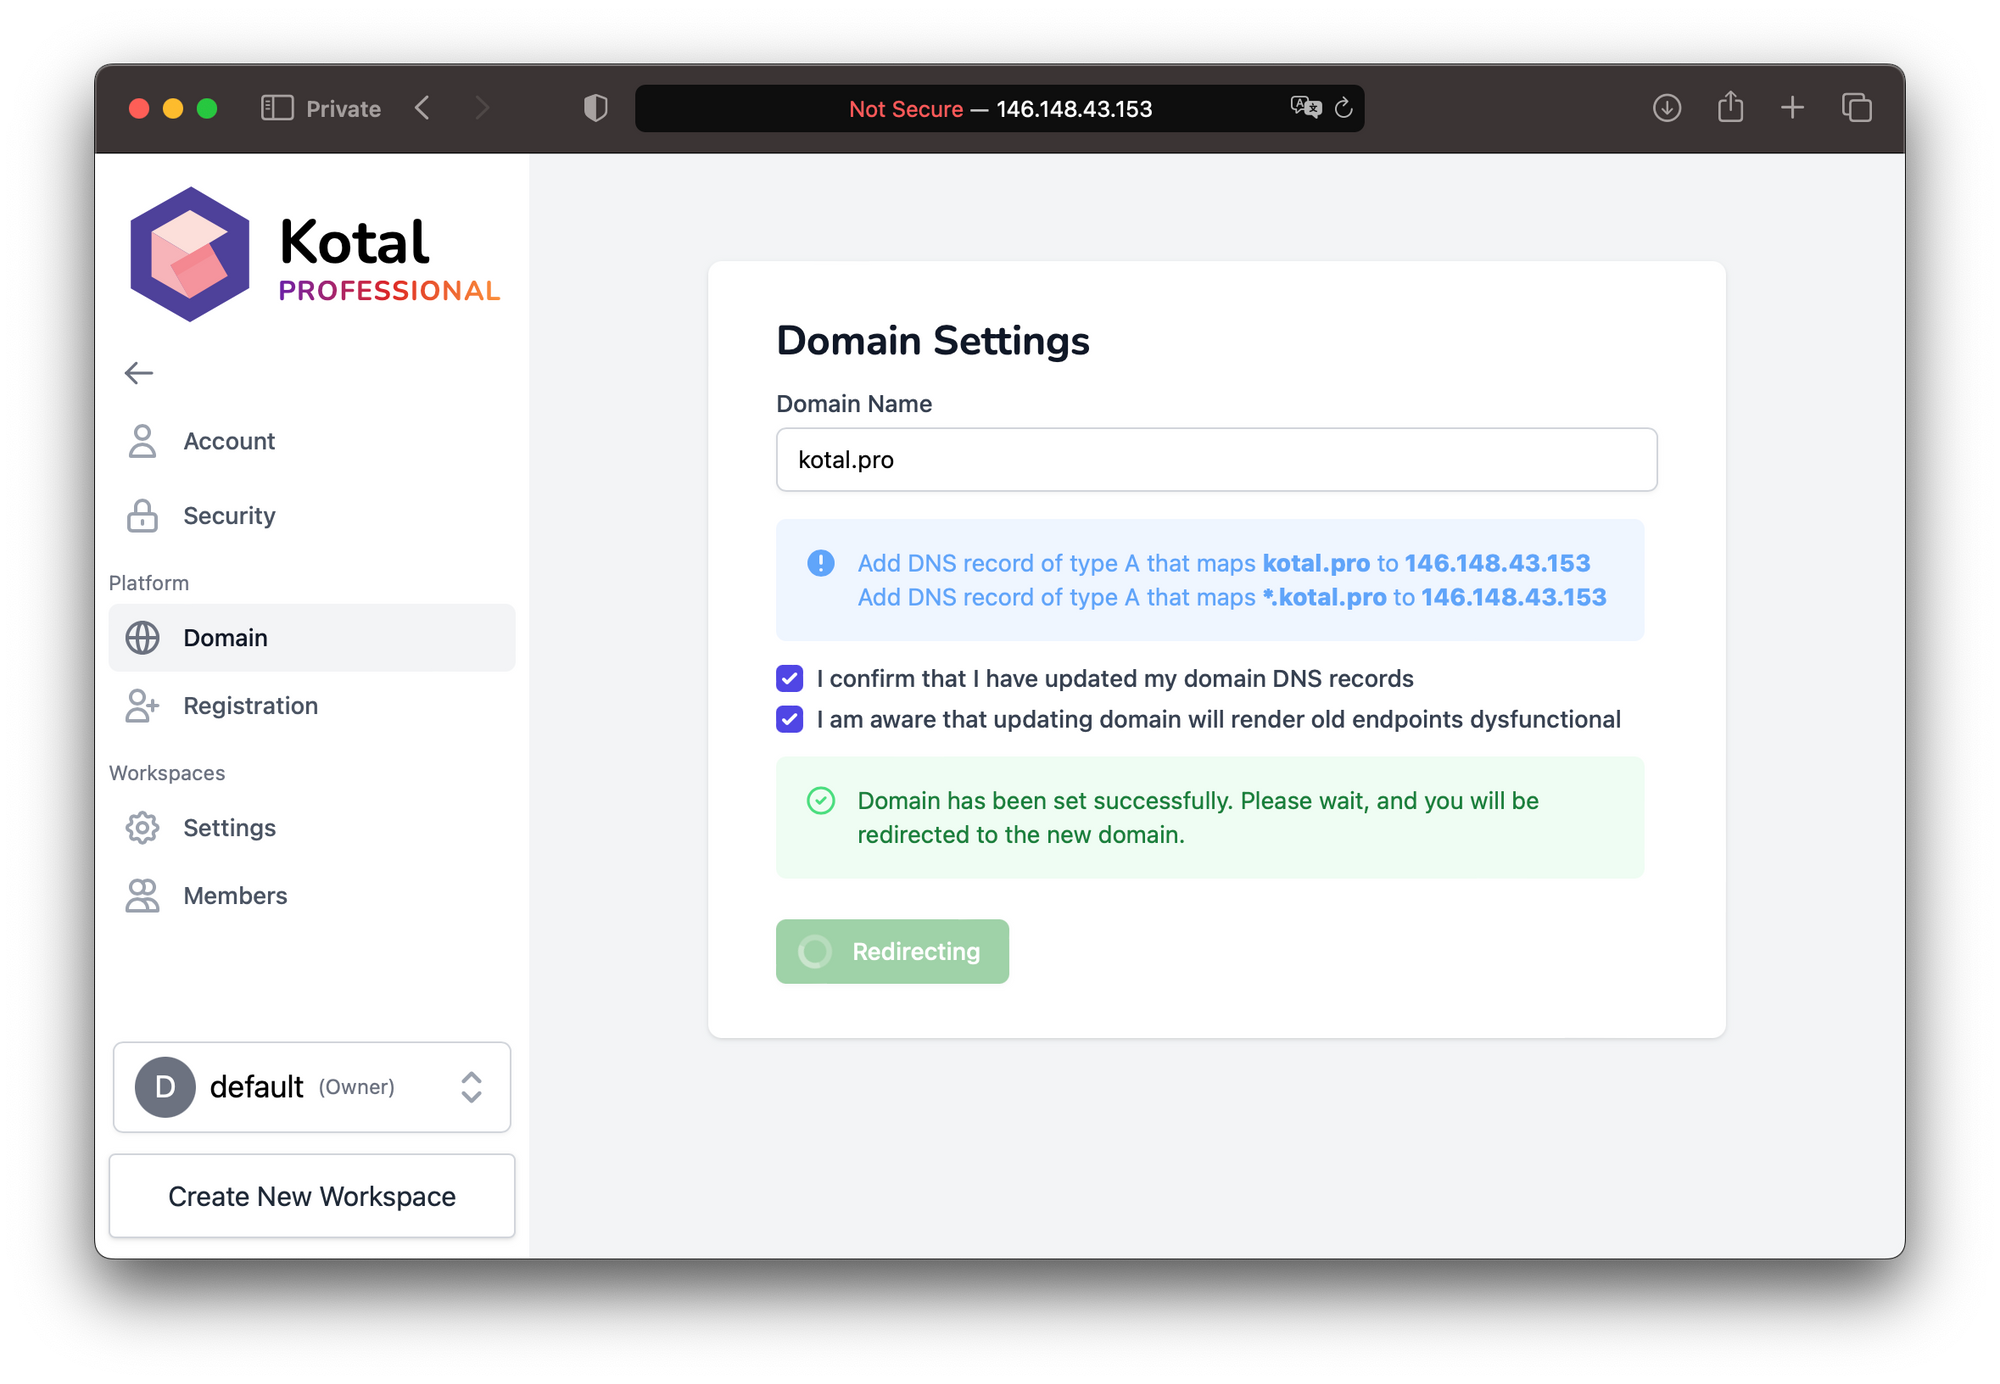
Follow the instructions and update your domain DNS records as shown in the picture.
Kotal will create a TLS certificate and will map https://your.domain to the Kotal Pro dashboard. Now visiting https://your.domain will load your Kotal Pro dashboard.
🔗 Create API endpoint for Polkadot node
Go to endpoints, and click on the + New Endpoint button.
Give your endpoint a name, select which deployment you want to create this endpoint for, and click the create button.
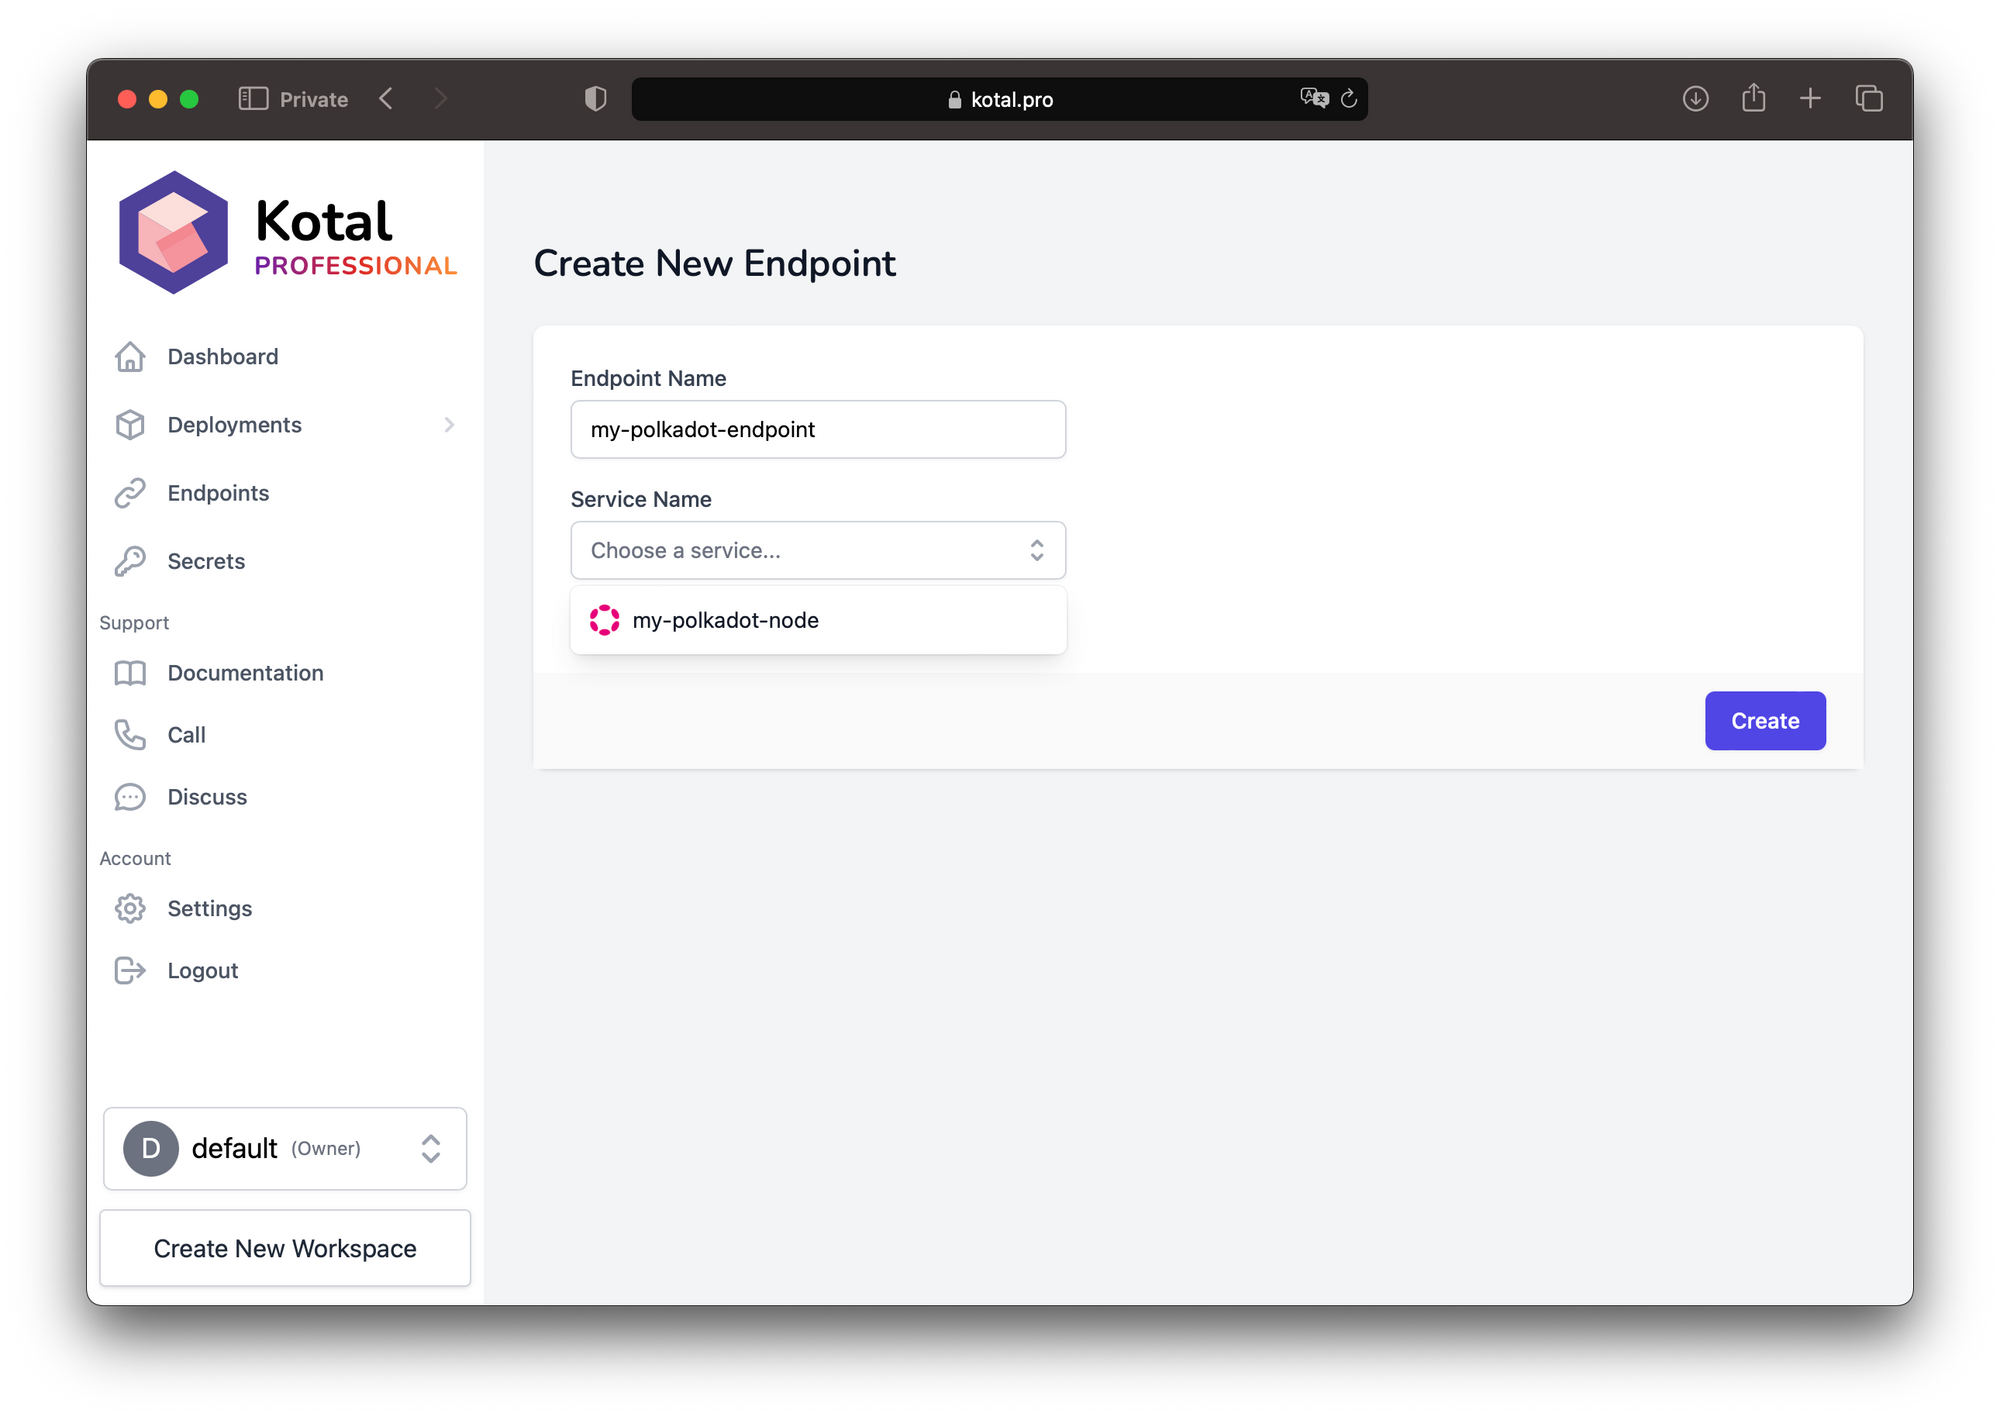
TLS secure endpoint that uses your custom domain and points to your polkadot deployment will be created in a few seconds.
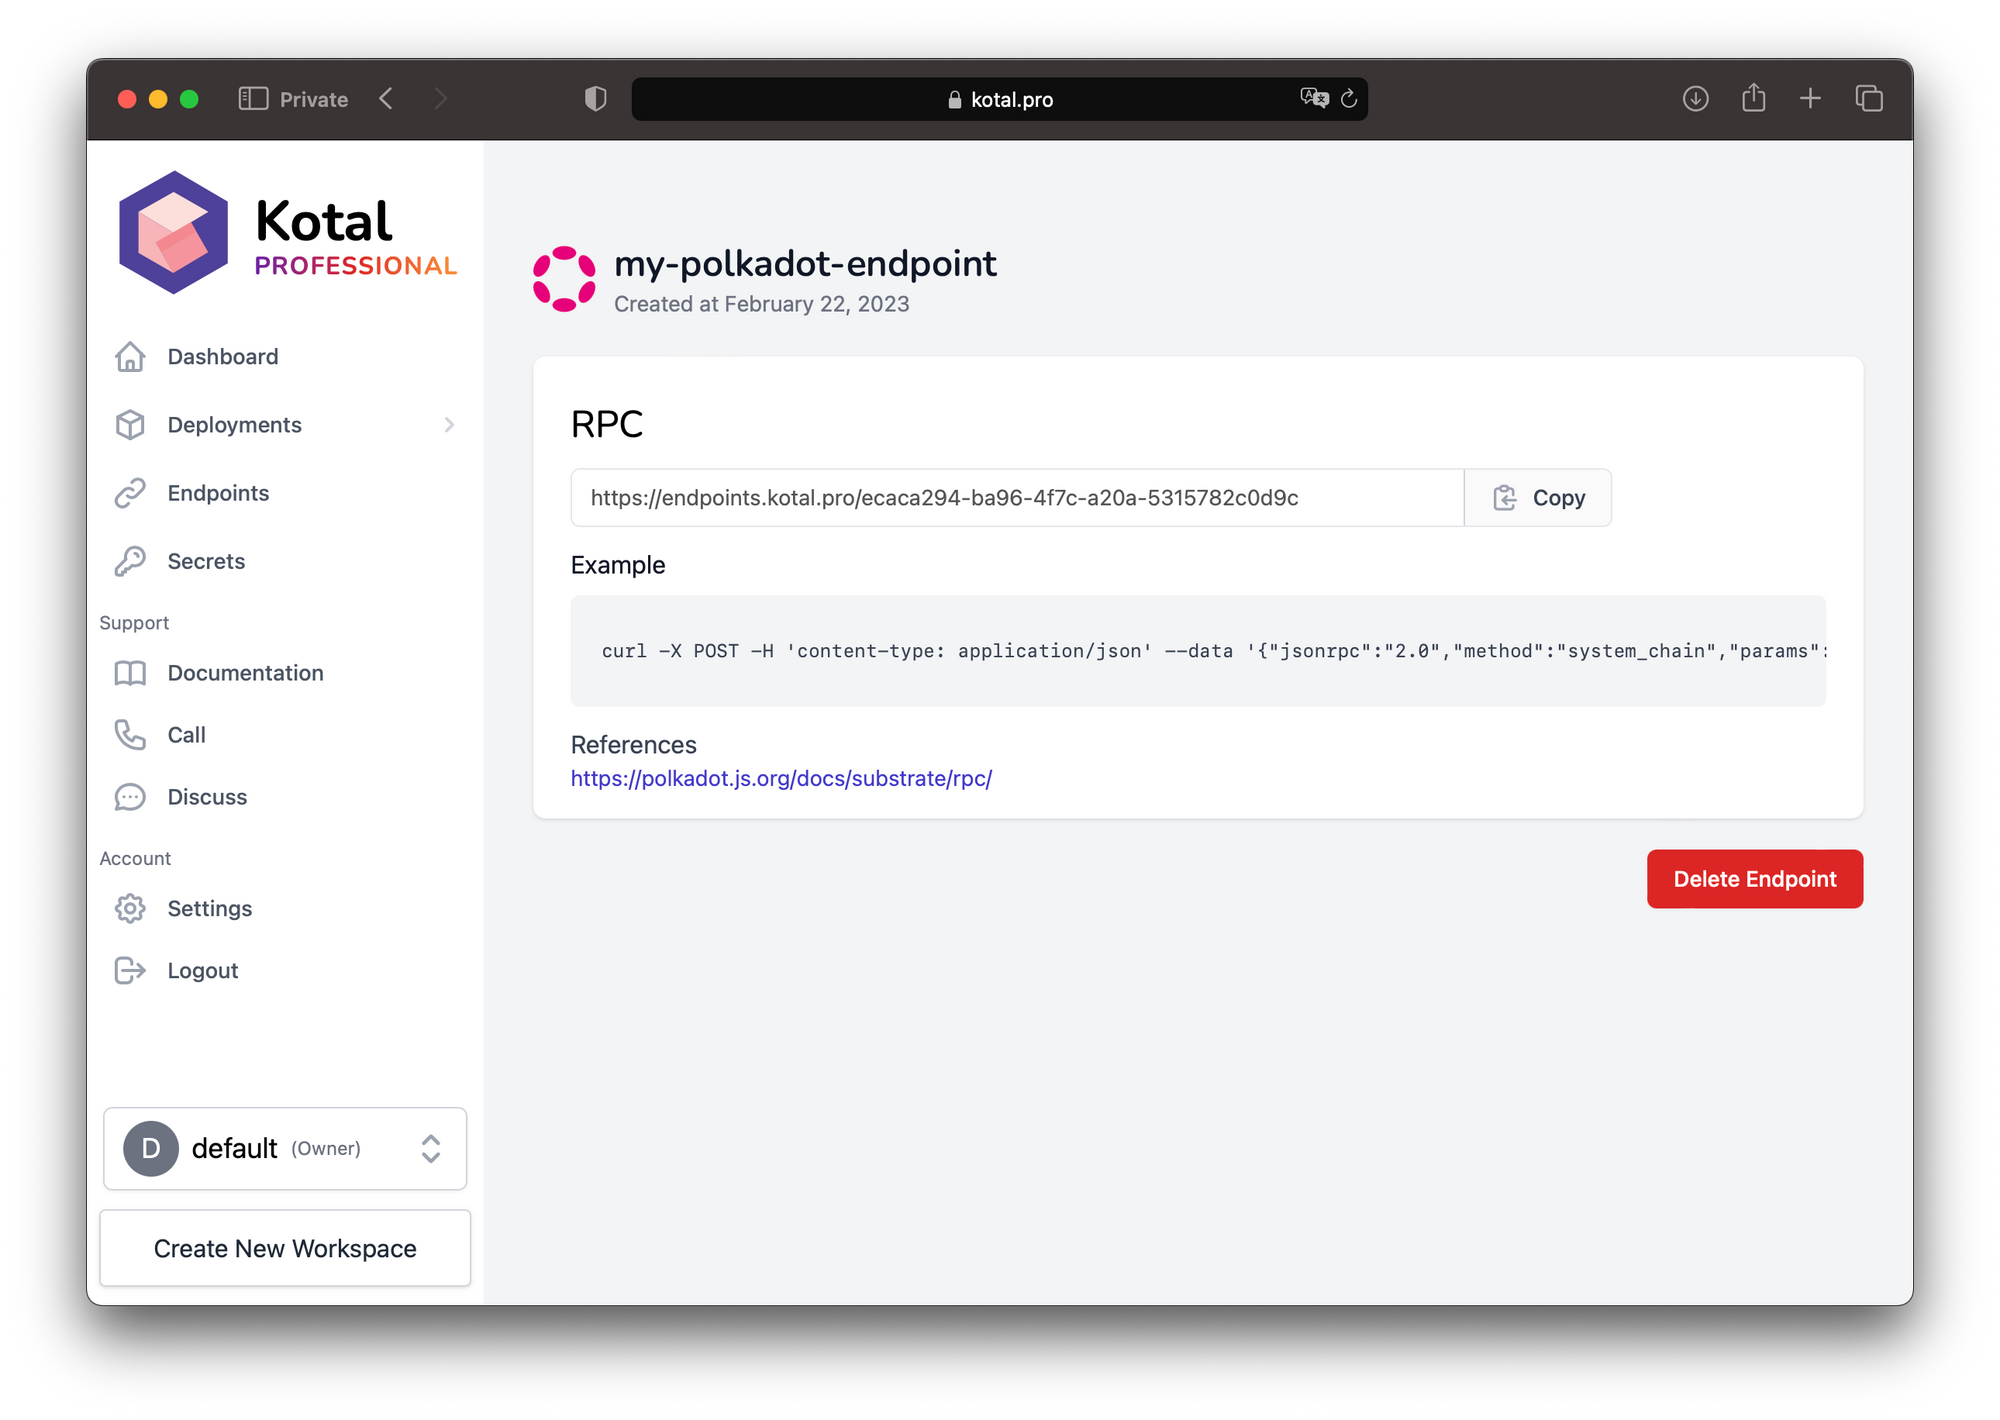
Copy the example and paste it into your terminal.
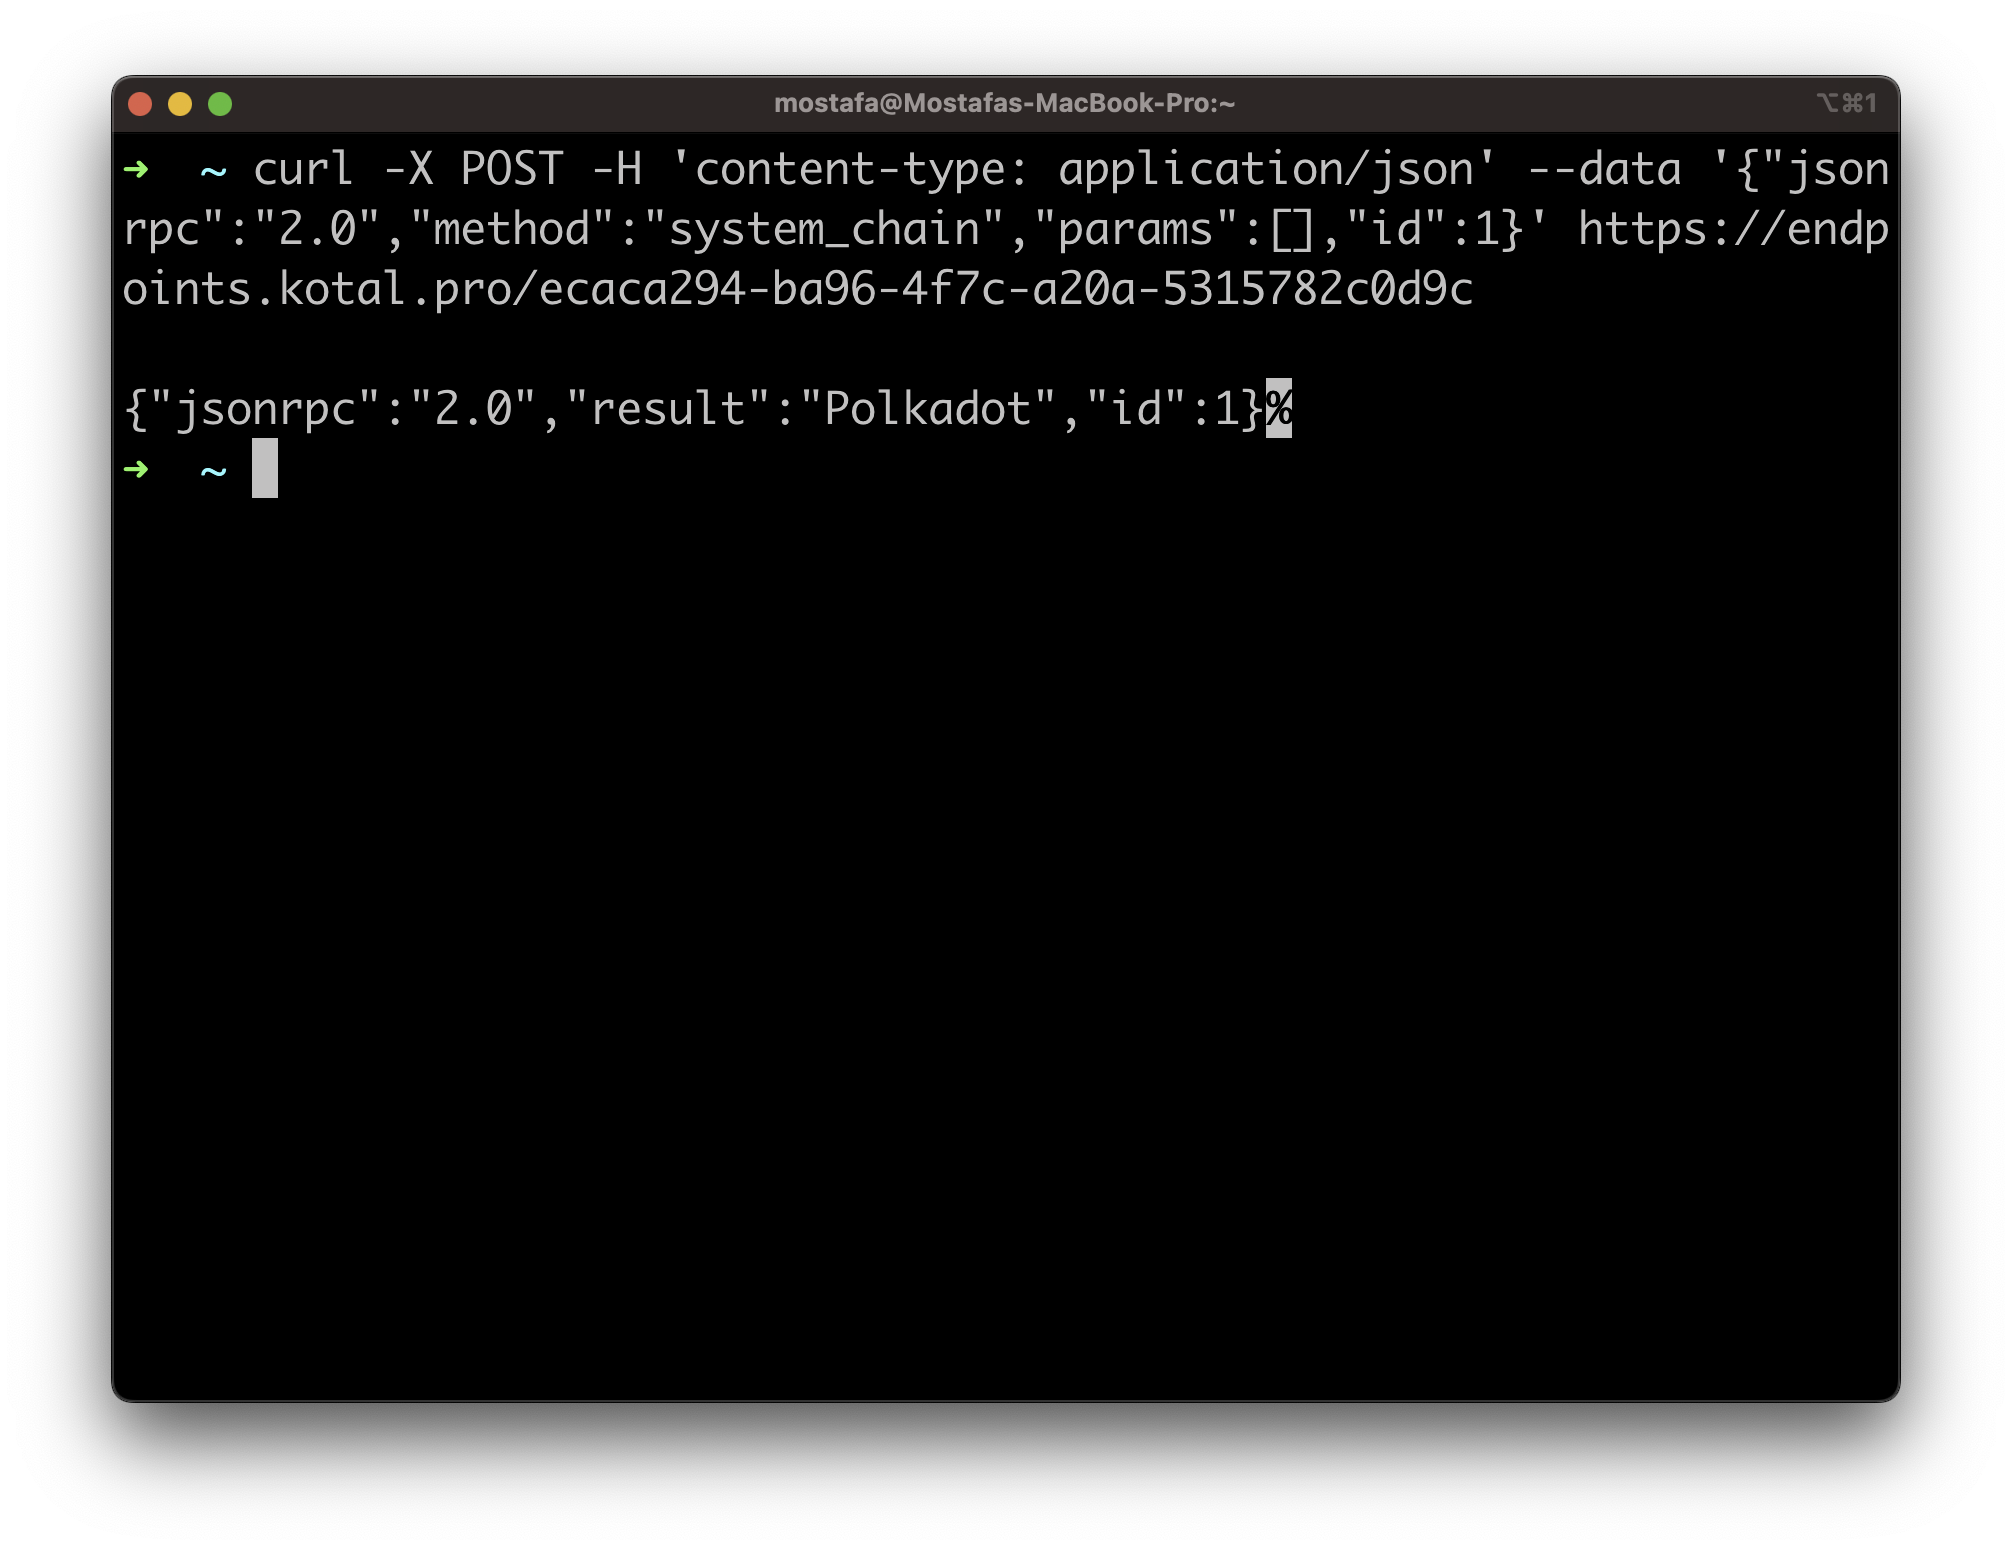
Our Polkadot node has replied to our JSON-RPC API call 😃
It's time to unlock the power of self-hosted Blockchain nodes and deploy your own nodes on your infrastructure. Kotal is cloud-agnostic, it can be installed in AWS, Microsoft Azure, Google GCP, DigitalOcean, Alibaba cloud, or any cloud that supports Kubernetes.
Get Started and get 1 month for free.